Showing posts with label Wood. Show all posts

Thursday, September 15, 2011

New Decor: 20$ Wall Art


Disclaimer: I've been trying to figure out how to write up this post for awhile because the wall art I made is heavily based on another person's work. I've decided that the best thing to do is be completely open about it and if the original artist wants me to take this down, then I will.  For the record, I'm okay with this post because I'm not ever intending to sale the wall art, its strictly for personal use.

I've been trying to find something to put over the couch for awhile. Our living room is very brown so I wanted some color. After browsing on Art.com I found this set and really liked it, but I just can't afford to spend 150$ on art right now. I had an idea to recreate this art with simple materials and cheaply.


I had this idea to cut some 12x12 wooden squares, paint them in fall colors, and then cut out standard white printer paper and  glue those on the wood, which is exactly what I did. I bought a four foot long 1x12 piece of wood and cut it into four equal pieces. I painted them with some acrylic paint, which surprisingly let the wood grain show through a little bit. After this dried I was a little disappointed with the colors, because they turned out a lot brighter than I hoped. I picked up an antiquing glaze at Lowe's and applied it to the wood. This stuff was magic. It rubs on as this dark green black oil but then when you wipe it off it leaves your colors looking aged. I started with the yellow board and almost was a bit worried when it was black green before I rubbed it out.  Once I wiped it off though, I really liked the look.


Before glaze, too bright    After glaze, much better!


For the silhouettes I made a pattern on the computer, printed it out and cut it out with an Xacto knife.  My plan was to use spray adhesive on the cutouts and then somehow get them to the wood and glue them on. I didn't have a solid plan here but accidentally discovered a neat method.  I had put the cutouts on some old cardstock before I sprayed the adhesive. Interestingly enough, the overspray was enough to hold the cutouts to the cardstock, which allowed me to easily transfer the cutout to the wood by just putting the cardstock on the wood, applying a little pressure and removing the cardstock. I'm pretty happy with the results.
After spraying with spray adhesive
I ended up hanging these with picture frame hanging wire. I just wrapped the wire around a machine screw, twisted it around, and then screwed in the screw. I did the same thing for the other side, screwing it in when the wire was pretty tight.  Here's a couple pictures of the process.


I hung these using a level and some nails and I love the result.  I really liked the final result and I'm keeping this idea around for future projects. 

Until next time, keep having fun!


Saturday, September 3, 2011

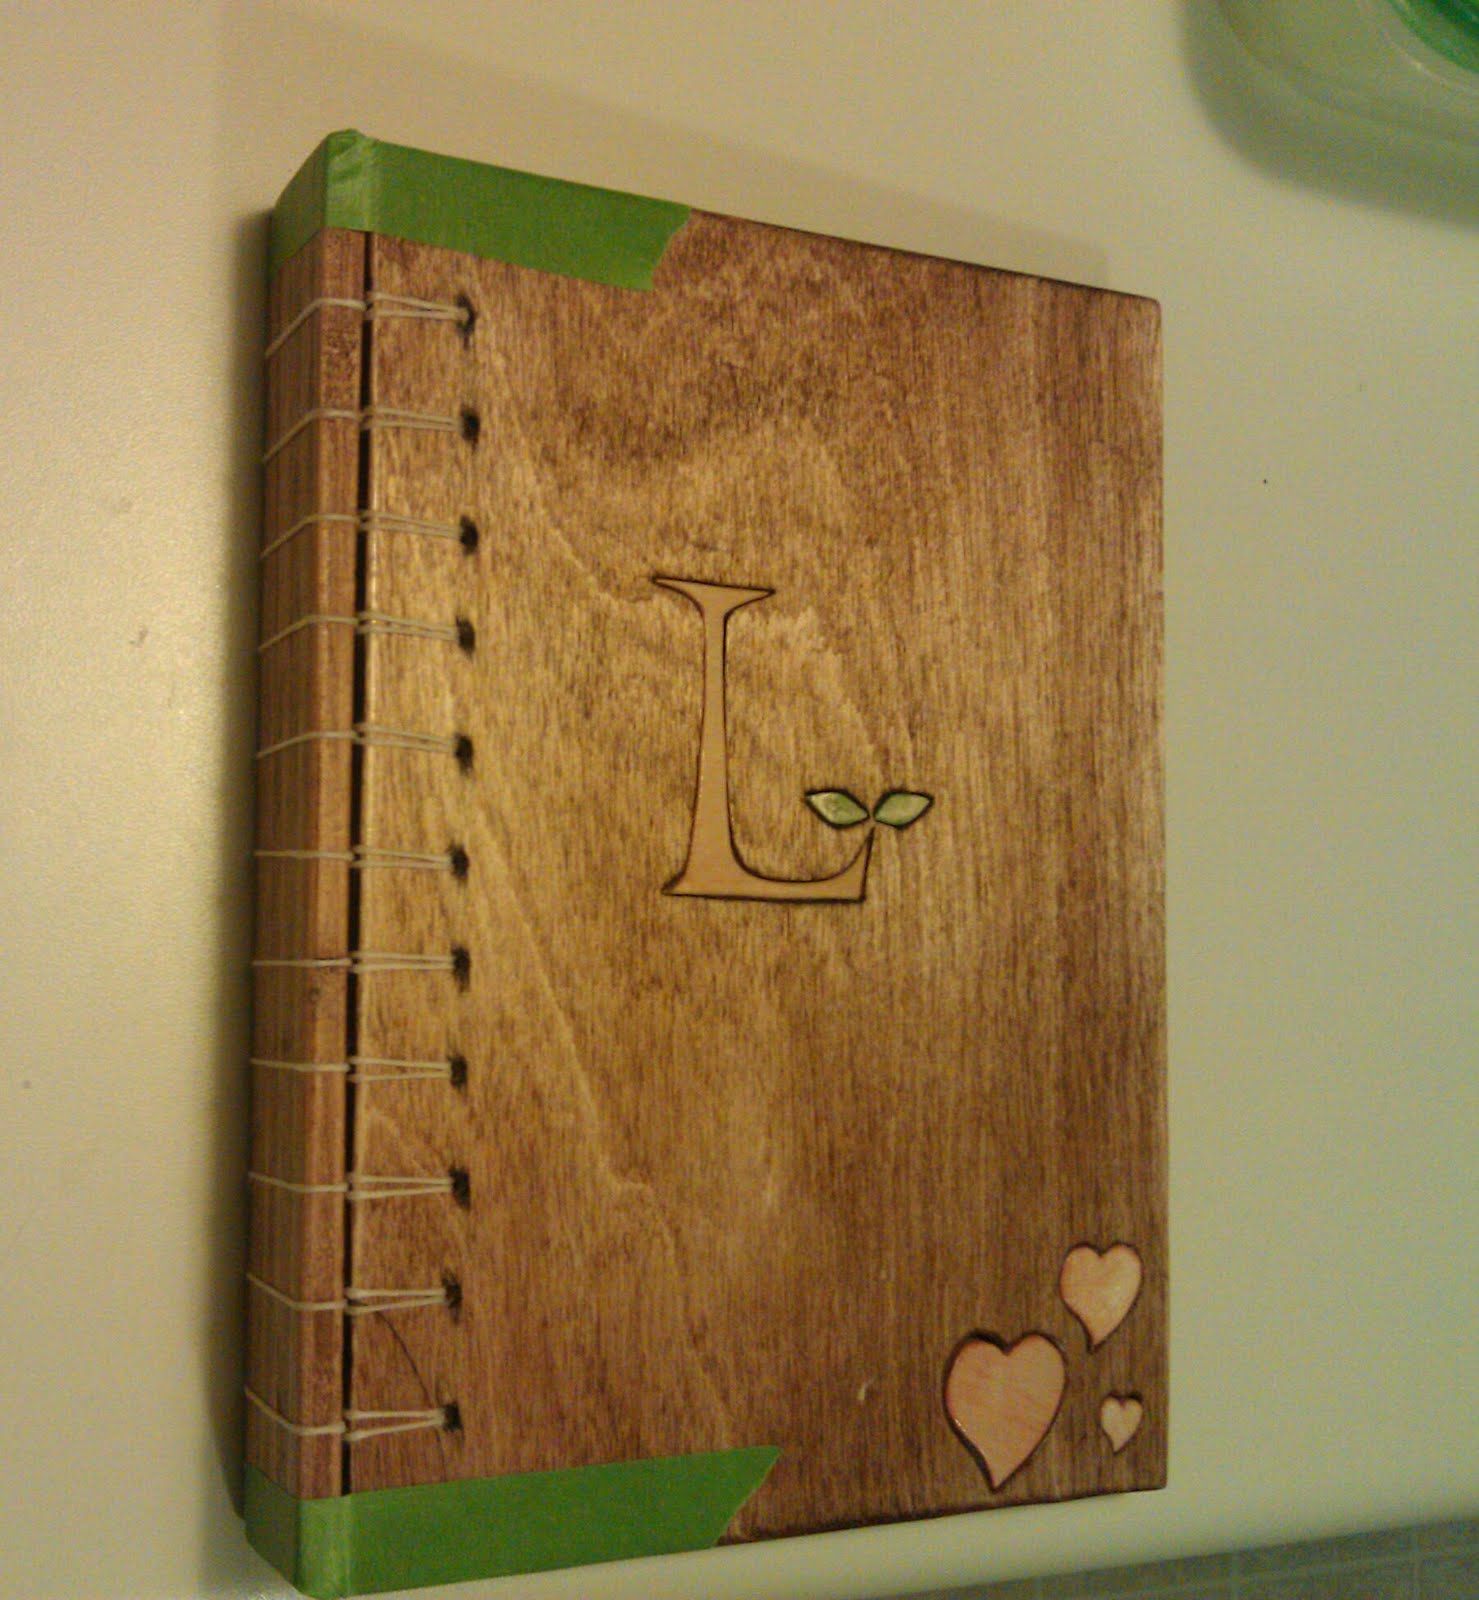
Project "Belgium" - Wooden book for Lauren

A couple weeks ago, I discovered Pinterest - a virtual pinboard of everything awesome. Basically the idea is that if you see something on a blog or website you can make a "pin" of it and share it with the world. You can organize your pins onto different boards and keep up with ideas. If you're interested, here's all of my pinboards. One day while I was on pinterest, I saw a post about book binding/making and I was intrigued. I promptly researched book binding and made a new board focused on bookmaking [which is here]  At this point, I decided that I was going to make a book for Lauren.

My favorite bookbinding method that I found was the "Secret Belgian Binding" which actually yields a book with a spine, instead of just front and back covers.  I decided to step it up a little bit and make a book that had wooden covers, since I've been itching to use my scrollsaw recently.  I drew up this pattern in Illustrator and then let started picking out wood. I had a scrap piece of 1/4" baltic birch plywood. It sounds fancy but its really just the stuff I bought at Hobby Lobby awhile ago. Yay Hobby Lobby!

Anyway, I printed the pattern [black outlines, not this colored version] and cut out the pieces. I cut the holes out  and then cut all the shapes out separately. After cutting all the pieces, I stained the pieces to get different colors. I had a bunch of stain on hand from when I was testing out colors for my furniture, so I actually had the shades that I wanted. The L was stained with some Minwax "Golden Oak",  the leaves were done in the same Behr stain that I used for Lauren's Coasters and the Hearts were done in some kind of Minwax maple stain.

By the way, this is a perfect example- ALWAYS test your stain colors before using them. The maple stain was supposed to be a nice warm golden color...as you can see in these photos, it was very pink on pine. For this project, the pink worked out. For anything else though, that pink would have been disastrous


Once the stain dried I glued the pieces into the holes.  For this project, the little gaps didn't matter so I didn't bother filling them in. I drilled holes in the covers and then polyurethaned them and the spine.  I followed the Belgian Book Binding instructions from here.  I used 5 sheets cream colored paper folded in half per signature and I also added some green cardstock inside both covers. I used waxed linen string for the binding.

If you're curious, I attached the green cardstock to the cover using spray adhesive and I made the pages look a little homemade by running a razor along the edges of the paper.


And now for some pictures:


I'm really happy with how this turned out and Lauren seemed to enjoy it.  Now I'm going to head to bed because I've got terrible headache. Hope everyone has a good weekend!

Sneak Peak: Project "ChopChop"

Now that I've moved in to my new apartment, I've started started using my scrollsaw again. After the success of Project "Belgium"  I  decided to keep on going with a project I've had in mind for a little while.   I really enjoy cutting out stuff from one piece of wood and then using that to fill in holes on another piece of wood, to achieve a two color effect. This time the project needed to be food-safe, so I've been working with white pine and red oak instead of staining pine different colors. [I have this probably irrational idea that stained wood wouldn't be safe for this project. Who knows?]

Anyway, I created a stencil in Adobe Illustrator, printed it out and used spray adhesive to attach it to the wood. I cut out holes in the pine and cut out solid pieces in red oak.  Hopefully I'll get better at This project because right now my shapes don't fit in my holes perfectly. Because of the secret project info nature of this project, I have to completely fill in all of these holes before I can sand it. I think I'm going to use a watered down glue and then put saw dust into the holes.

I'll come back to this post when I get it finished and to the recipient. Until then, between my text and these two pictures, perhaps you can figure out what it is and who it's for.


Update 9/3: I've gotten the whole thing cut out. Now to sand it and fill in all those pesky gaps.

Friday, September 2, 2011

Sneak Peek: Candlesticks and Coasters

Here's a sneak peek at the candlesticks and coasters that I made for our new apartment. Details to come!


Update 9/13: Here's the blog post!

Sneak Peek: Maple Leaf Coasters

These are some coasters I made for Lauren.  She loves them!
I'll write about it later...until then,  here's the sneak peek:


Sneak Peek: Wooden Clock

Once I got a scroll saw, the paper clock got put on hold for the wooden clock.

Until I write about it though, here's a sneak peek:


Sneak Peek: Living Room Tables

This post will be dedicated to the three tables I made for the living room. Sneak Peek:


Sneak Peek: Entertainment Center

This is going to be a detailed posted about the entertainment center I built. Until I get around to writing about it, here's some teaser photos :


Sneak Peek: Rose for Lauren

Here's a sneak peek at a wooden rose I made for Lauren. Details to come!